To create a course, you must have the Create Courses permission.
Learn how to assign permissions
Preparing a course
Follow these steps to create and set up a new course:
-
Go to My Learning (from the command bar or your profile menu).
-
Click Create course and select your language (if your organization supports multiple languages).
-
The new course appears in the Drafts area. Click the course to open it.
-
In the Course content tab, add and organize your learning materials:
-
Create lessons and tests. Learn more about tests
-
Add modules such as resources, people, or featured communities. Learn more
-
Customize the layout and upload a cover image
-
-
In the Participants tab, enroll learners (if the course is mandatory).
-
In the Settings tab, adjust edit rights to include any collaborators.
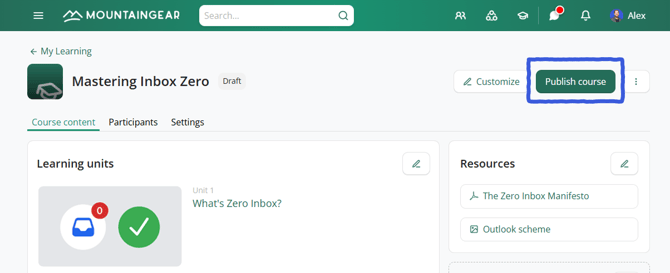
Publishing a Course
You can make as many edits as needed while a course is in draft. When the course is ready to go live, click Publish course.
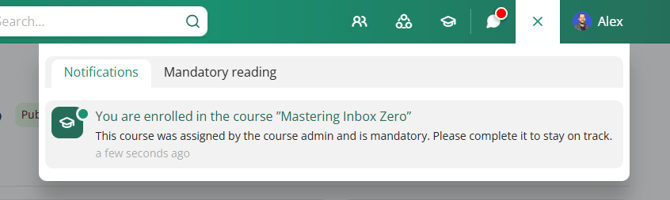
Notifying Participants
If participants are enrolled, they’ll receive an in-app and mobile notification when the course is published. (No email notification is sent.)
Updating a published course
You can update a published course at any time. The effect on participants depends on what you change.
Scenario A: Updating or adding lessons or tests
You can:
-
Edit an existing lesson or test, then publish it.
-
Add a new lesson or test, then publish it.
You can save your edits as drafts and publish them later. To view draft units, open the Learning units module and click Edit — draft items will be clearly labeled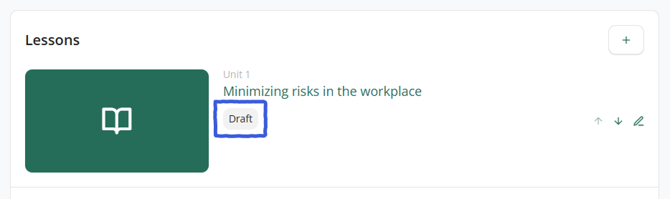
Important: Impact on Participants’ Progress
-
Scenario A1. Editing an existing lesson or test:
Does not affect participants’ progress. Learners who completed the unit keep their completion status. -
Scenario A2. Adding a new lesson or test:
Affects progress. The new unit appears as not completed for all participants.
Example: In a 4-lesson course, adding a 5th will change progress:-
Participants still in progress (e.g. 3/4) will now show 3/5 (60%).
-
Participants who had completed the course will move back to In progress and show 4/5 (80%)
Tip: To avoid this, you can remove completed participants before adding new lessons.
-
-
Scenario A3. Removing a lesson or test:
Also affects progress, but in reverse. Removing a unit increases participants’ progress — for some, it may automatically mark the course as completed.
Scenario B: Updating other course Content
Changes such as:
-
Editing the title, cover image, or layout
-
Reordering units
-
Adding, removing, or rearranging modules
…are saved instantly and have no impact on participants’ progress.
You do not need to re-publish the course for these updates.
Other Course Workflow Actions
Duplicate learning units
-
Edit the unit (lesson or test) you want to duplicate.
-
Click the More menu and select Duplicate.
-
You’ll be taken to the new copy (the title will include “(Copy)”).
Note: For published courses, the same progress consequences described in Scenario A2 apply.
Delete learning units
-
Edit the unit you want to delete.
-
Click the More button on the top-right corner and select Delete, then confirm.
Note: For published courses, progress changes described in Scenario A3 apply.
Delete courses
-
Open the course (draft or published) you want to delete.
-
Click the More menu and select Delete, then confirm.
Be careful: The course, its content, and all participant data will be permanently deleted. Currently, there is no feature to archive or unpublish a course.